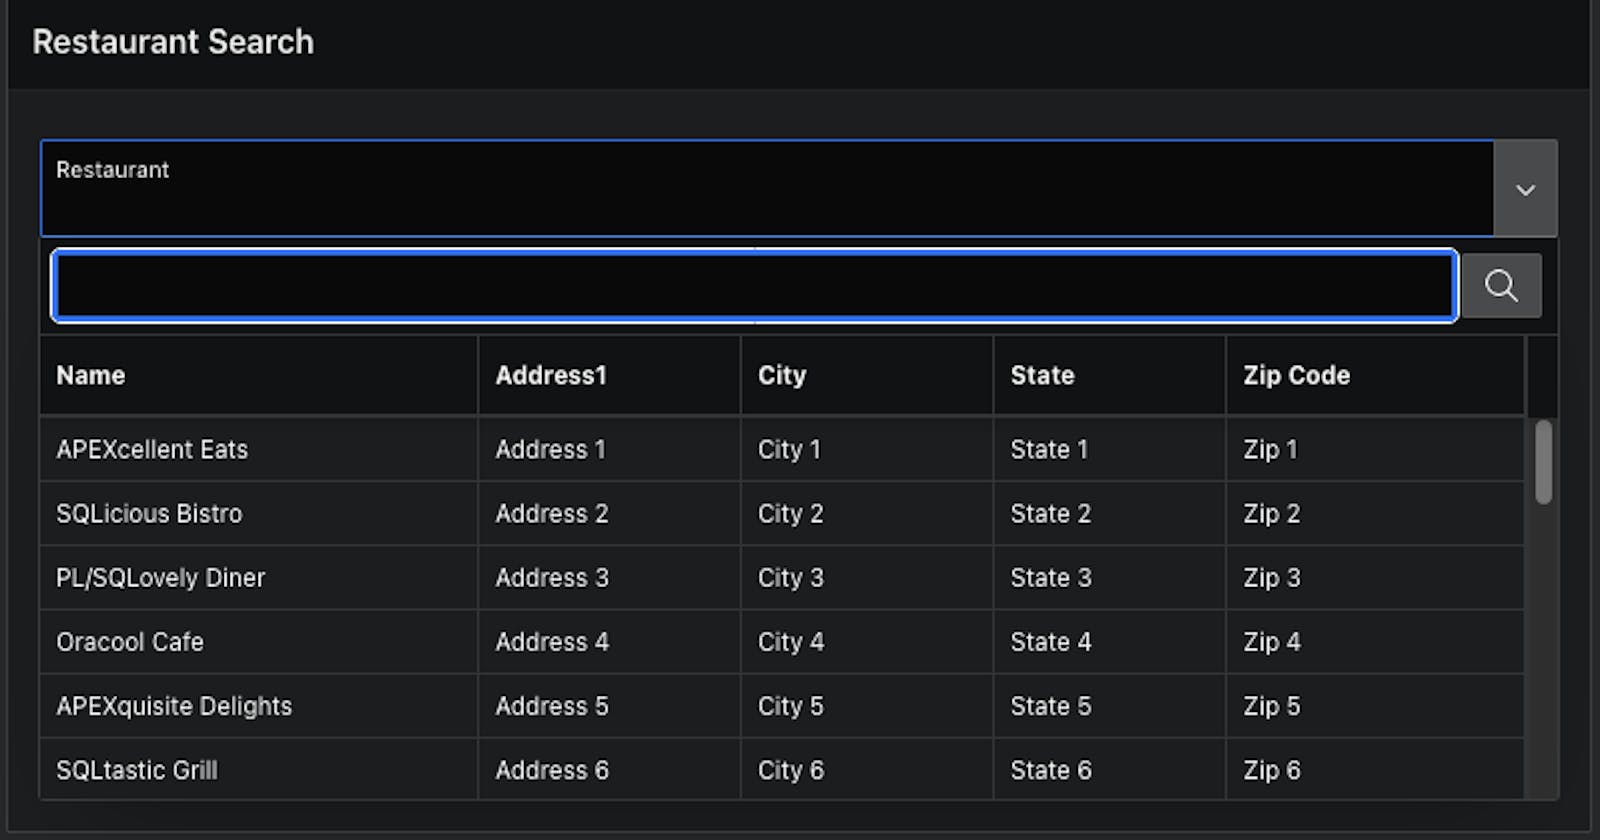


Popup LOV is a very common APEX item type, used to cover more complex features that are not available in the Select List type, allowing us to search, and display multiple columns, which might be very helpful to decide which column you want to pick. But, Popoup has also the ability to return additional columns to items on the page.
In this blog post, I will cover the Popup LOV feature called Additional Outputs, which is I believe not well known. This simple functionality might be very useful in your development, whenever you have items in a form that should have the same value as Additional Columns of the Popup LOV.
List of Values
Let's quickly go through defining a list of values. List of Values (LOV) has a display and returns columns, standardly named as d for display value and r for return value. On the List of Values page under Shared Components you can define LOV, just provide the name, and follow the next steps. Example of a very simple LOV query, displaying column name and retrieving the value of id column.
select name as d, id as r
from demo_restaurants;
I am selecting two columns, d as a display value and r as the value that will be returned by the item.
The next step is to map columns.

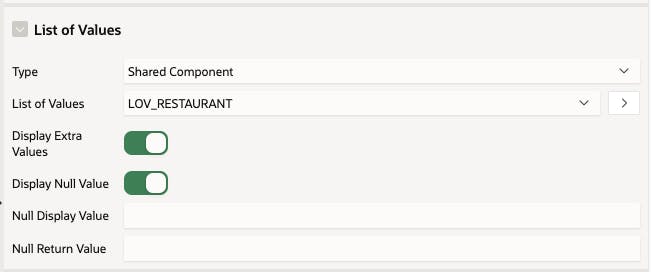
Now, LOV is ready to be used across your app. You can simply use it just pick it up from the Shared Components LOV.
Additional Columns
To fully leverage the Additional Outputs functionality, you need to define Additional Columns. This is particularly useful when a single display column may not uniquely identify a record, such as when dealing with the same restaurant name in different locations.
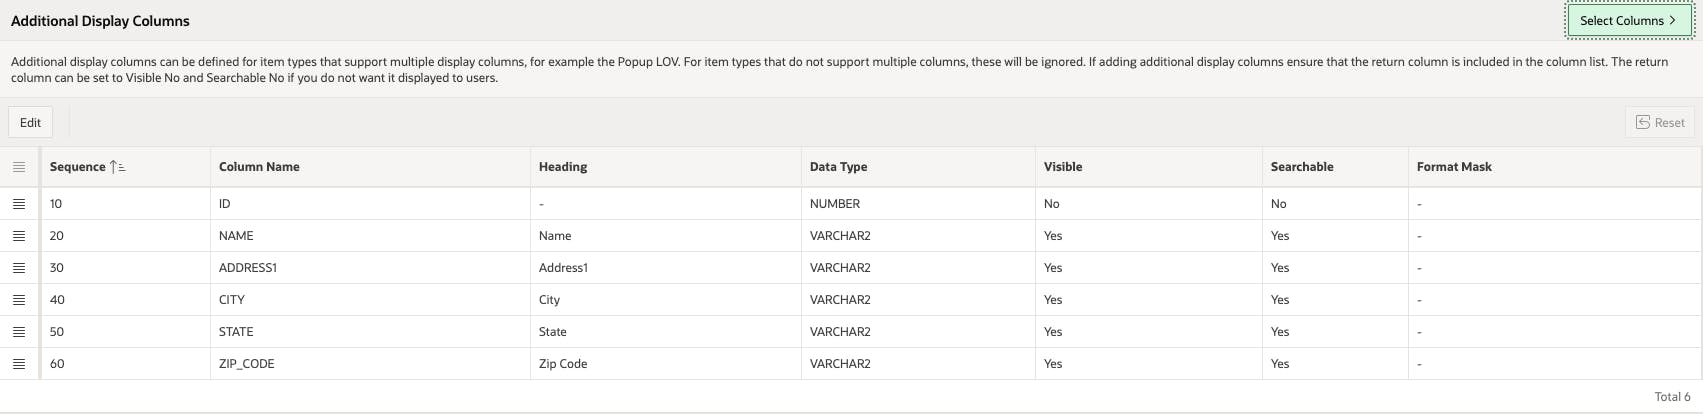
You can define display columns, and choose which columns are visible and searchable, you can set the display order etc.
Additional Outputs
Imagine you are working on a restaurant app, where you need to prefill fields such as name, address and city… that you already have in the database, so additional outputs can help you with that.
Once you have additional columns set, you can move to your page with the Popup LOV item and define Additional Outputs.
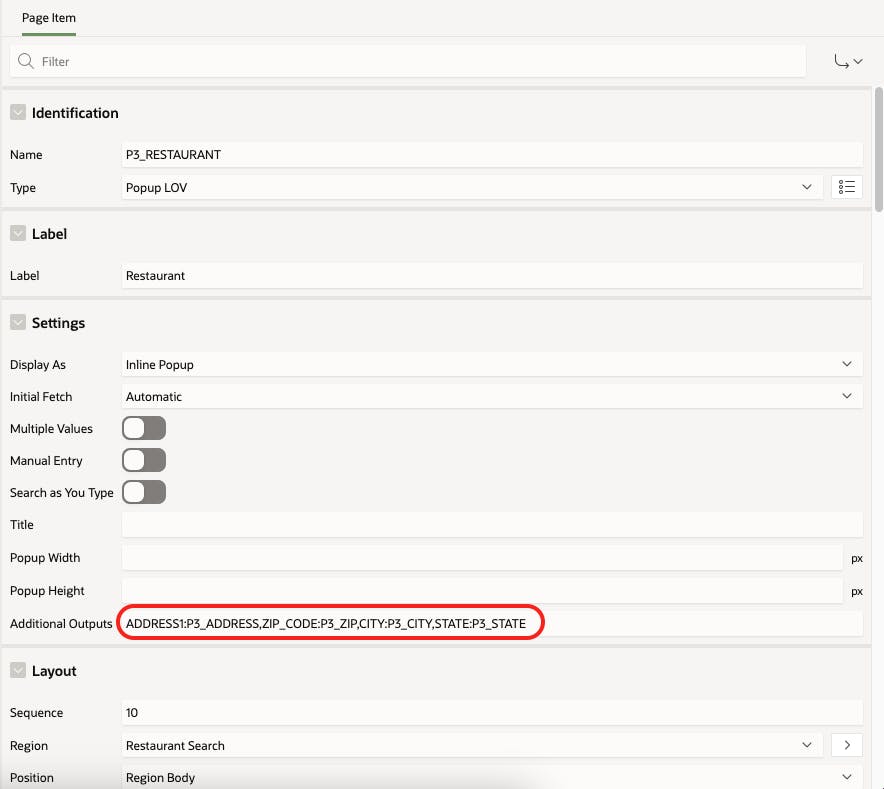
So it is important to map your columns, which are defined in LOV with page items. Example: COL1:P1_ITEM1,COL2:P1_ITEM2. If the columns and items are mapped correctly, no additional setting is needed.
Now, is the time to test if items are set correctly after we choose a value in Popup.

Additional Outputs feature is available in the Interactive Grid Popup LOV column as well.

Set the Additional Outputs attribute using the column Static IDs. For instance, ADDRESS1:ADDRESS_IG,CITY:CITY_IG,STATE:STATE_IG,ZIP_CODE:ZIP_CODE_IG
In Conclusion
This simple Popup LOV functionality might be very useful whenever you need to set some items from your additional columns. Doesn't matter if it is a page item or an Interactive Grid column. Simple, easy and super useful 🙂